
| 일 | 월 | 화 | 수 | 목 | 금 | 토 |
|---|---|---|---|---|---|---|
| 1 | ||||||
| 2 | 3 | 4 | 5 | 6 | 7 | 8 |
| 9 | 10 | 11 | 12 | 13 | 14 | 15 |
| 16 | 17 | 18 | 19 | 20 | 21 | 22 |
| 23 | 24 | 25 | 26 | 27 | 28 |
- DATAPATH
- github
- instruction
- XML
- Algorithm
- python
- Class
- Java
- CSS
- DoM
- MacOS
- react
- data structure
- html
- system
- Linux
- while
- javascript
- Pipelining
- DB
- for
- web
- function
- DS
- computer
- MIPS
- architecture
- php
- control
- mysql
- Today
- Total
YYYEJI
[WAS] IntelliJ로 Spring tool 사용하기 본문

IntelliJ를 이용해서 Spring tool을 실습해 보겠습니다.
IntelliJ IDEA 열기

New project 생성하기

✓ Generators - Maven Archetype
✓ Name - ??????????
✓ Archetype - org.apache.maven.archetypes:maven-archetype-webapp
✓ Create Button Click
Framework 추가하기


✓ Spring MVC (5.2.3.RELEASE)


설정 파일 변경


라이브러리 추가하기


✓ pom.xml에 가서 마지막 </dependency> 밑에 새로운 라이브러리 추가
✓ IntelliJ는 검색 기능이 있어서 편하게 라이브러리 추가 가능
✓ webmvc라고 </dependency> 밑에 치고 org.springframework:spring-webmvc 더블 클릭


✓ 새로운 라이브러리 추가했고,
✓ pom.xml 우클릭하고 Maven 클릭, Reload project 해주기

Reload가 끝나면 External Libraries 밑에 Spring 관련된 라이브러리가 추가된 것을 확인할 수 있습니다.
외부 라이브러리는 직접 관리하는 것이 아니라 Maven의 pom.xml을 통해서 관리할 예정이기 때문에, lib 폴더는 삭제를 해줍니다.


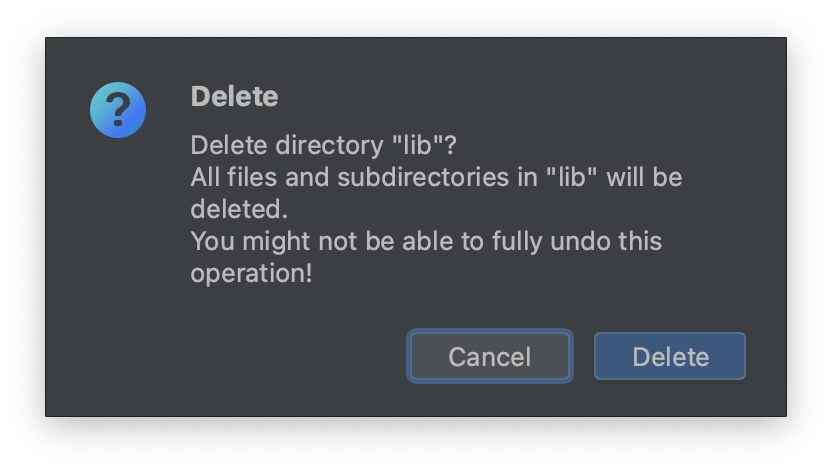
✓ Delete !
삭제가 안 된 묘듈까지 삭제해주기 위해 프로젝트 우클릭 후 Open Module Settings에 들어가 줍니다.


✓ Libraries에 들어가 두 개의 모듈 삭제하기
설정 파일 변경
<?xml version="1.0" encoding="UTF-8"?>
<beans xmlns="http://www.springframework.org/schema/beans"
       xmlns:xsi="http://www.w3.org/2001/XMLSchema-instance"
       xmlns:mvc="http://www.springframework.org/schema/mvc"
       xmlns:context="http://www.springframework.org/schema/context"
       xsi:schemaLocation="http://www.springframework.org/schema/beans
        http://www.springframework.org/schema/beans/spring-beans.xsd
        http://www.springframework.org/schema/mvc
        http://www.springframework.org/schema/mvc/spring-mvc.xsd
        http://www.springframework.org/schema/context
        http://www.springframework.org/schema/context/spring-context.xsd">

    <mvc:annotation-driven />
    <context:component-scan base-package="com.example" />

    <bean class="org.springframework.web.servlet.view.InternalResourceViewResolver">
        <property name="prefix" value="/WEB-INF/views/" />
        <property name="suffix" value=".jsp" />
    </bean>
</beans>
✓ 위에 있는 코드를 dispatcher-servlet.xml에 붙여넣기


✓ property의 value를 /WEB-INF/views/로 설정해줬기 때문에 WEB-INF 폴더 밑에 views 폴더 생성


✓ index.jsp 파일을 새로 생성한 views 폴더 밑으로 이동
Controller 생성하기


✓ src/main 폴더 밑에 java 하나 생성


✓ java 폴더에 pakage 하나 생성하는데 Java Class 클릭하고 com.example.HomeController 입력하면 자동으로 pakage 생성

✓ 클래스 위에 @Controller 추가하면 Controller로 등록됨

✓ 클래스 안에 함수 작성
✓ @RequestMapping("/") 는 / 가 왔을 때 실행된다는 의미
✓ / 가 들어오면 아래 함수를 작동하게 됨.

✓ / 가 들어오면 index를 호출하는데 dispatcher-servlet에서 property를 설정해 줬기 때문에,
✓ WEB-INF/views 폴더 밑에 있는 index.jsp 를 부르게 됨.
실행했을 때 Hello world!뜨면 성공!

◡̈
'Web Application Server (WAS)' 카테고리의 다른 글
| [WAS] IntelliJ에서 MyBatis plugin 설치하기 (0) | 2022.12.07 |
|---|---|
| [WAS] IntelliJ에서 Spring 배포하기 (0) | 2022.12.02 |
| [WAS] Spring Framework (2) | 2022.11.30 |
| [WAS] JSP Model Architecture (0) | 2022.11.29 |
| [MacOS] MySQL connecter(Maven 라이브러리) 연결하기 (0) | 2022.11.15 |


